

How To Transfer Pictures From Camera To Laptop Email
Z7_3054ICK0KGTE30AQO5O3KA30N0
HP PCs - Copying Photos from a Camera to Your Estimator (Windows 8)
This document pertains to HP and Compaq computers with a memory card reader, and a digital camera.
Import your photos into Windows Photograph Viewer from your camera so you can view, organize and share them.
notation:If you are non using the latest version of Windows eight, some graphics and information in this document may vary. You can get the latest version from the Microsoft Store.
Step 1: Connect the photographic camera or the memory card to your figurer in Windows 8
Before y'all can transfer photos from your photographic camera to your computer, y'all must first connect the hardware containing the digital photographs to your calculator using one of the following methods:
Connect hardware option i - Connect the camera to the computer using a USB cable
-
Make sure the computer is turned on and Windows is open. For all-time results, save any work currently in progress and close any software programs that may be open.
-
Connect the camera and reckoner using the USB cable that came with your camera, and then turn on the camera.
notation:
If your camera came with an IEEE 1394 (FireWire) cable and your computer has an open 1394 port, y'all can use 1394 instead of USB.
Figure : Cable connection from the photographic camera to a PC

Figure : Cable connection from the camera to a TouchSmart or AiO

-
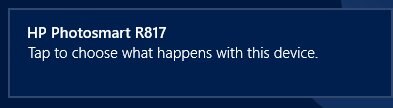
Wait while Windows recognizes the camera and configures information technology for use in Windows. A window opens in the upper right corner of the figurer screen showing the name of the camera.
Figure : Camera detected
-
Tap or select the device in the window to open the Autoplay Window.
-
Click Import photos and videos.
Effigy : Import photos

-
Your photos and videos are displayed on the screen and prepare to exist imported.
Effigy : Photos on the photographic camera

OR
Connect hardware option 2 - Apply the memory card
Most cameras use a removable retentivity carte du jour to store digital photographs. If you lot have a memory card reader for your computer and it supports the same blazon of carte used by your camera, then yous tin can use a memory bill of fare reader to access your photographs on the estimator.
-
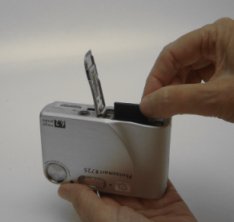
Remove the memory carte from your photographic camera. The retention card is often concealed past a slide-out panel on the camera.
Effigy : Camera memory card
-
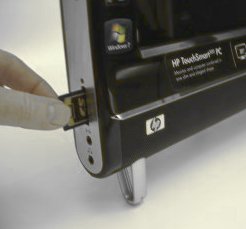
Insert the memory card into the appropriate memory card slot in the carte du jour reader.
note:
If your computer does not accept a congenital-in carte du jour reader, yous can use an external USB menu reader that is compatible with your photographic camera's memory bill of fare blazon.
Effigy : Retentivity card reader in a notebook estimator

Figure : Retentiveness card reader in a standard desktop PC

Figure : Retention card reader in TouchSmart or AiO
Effigy : External USB card reader in a USB port

-
Expect while Windows recognizes the memory card and configures it for use in Windows. A window opens in the upper right corner of the reckoner screen showing the name of the card or retention device.
Effigy : Memory card detected

-
Tap or select the device in the window to open the Autoplay Window.
-
Click Import photos.
Figure : Memory card AutoPlay

-
Your photos and videos are displayed on the screen and ready to exist imported.
Figure : Photos on a retention card

Footstep 2: Import Pictures and Videos feature in Windows 8
Afterwards your hardware has been connected, the camera or memory bill of fare opens showing the pictures or videos on the device. Follow these steps to transfer the photos from the photographic camera or memory bill of fare to the calculator.
-
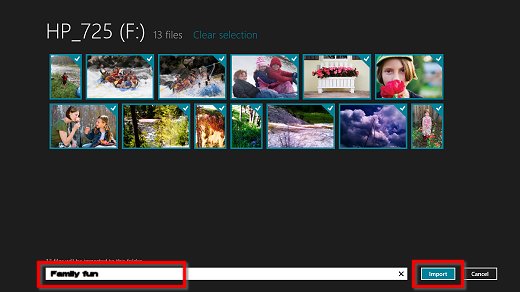
Select the pictures you desire to import to your calculator. Selected pictures or videos have a check (
 ) in the upper right corner.
 -
If yous would like the filenames on each file to start with a name, other than only a number, so blazon a name in the field provided. Otherwise, leave the field blank.
- Click Import.
Effigy : Import your camera or memory card contents
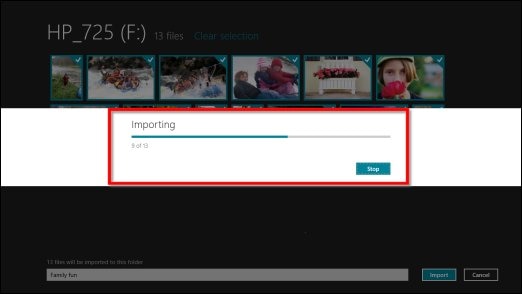
Your pictures are copied into the Pictures library.
Figure : Importing photos
-
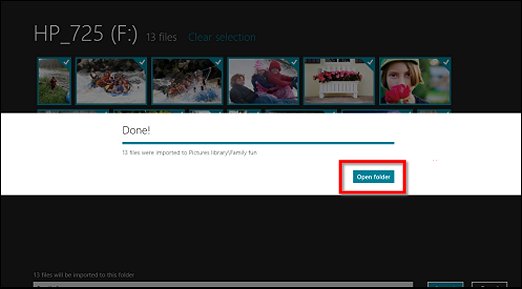
When Importing is complete, click Open folder to view the pictures or videos.
Figure : Import consummate
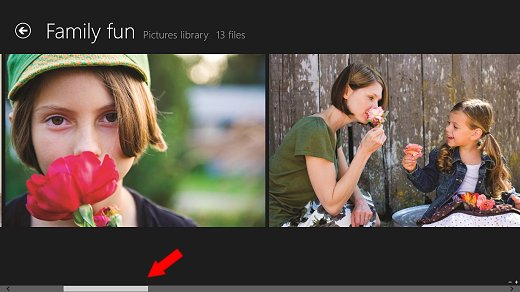
The Pictures Library opens showing your imported pictures.
-
Apply the slider at the lesser of the screen to curl through your photos.
Figure : Roll through your photos
Step 3: View your photos from the Start Carte du jour in Windows 8
Your photos are now viewable on the Outset carte du jour.
-
On the Start screen, tap or select the Photos tile to view the folders in the Picture show library.
Figure : Photograph tile

-
Right clicking on the Pictures library screen opens the Pictures library tools
Figure : Motion-picture show library tools
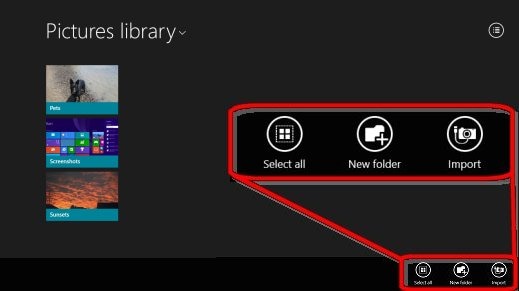
Within the Pictures library y'all can:
-
Select individual folders by correct clicking on the folder. Once selected, folders may be cutting, copied or deleted.
-
 - Select all the folders by using the Select all icon in the lower right corner of the screen.
 -
 - Create new folders organize photos by using the New folder icon in the lower right corner of the screen.
 -
 - Import additional photos to an existing folder using the Import icon in the lower right corner of the screen.
-
-
Tap or select a folder. The contents of the binder are displayed on the screen.
Right clicking on the screen opens tools that allow you to organize, select or delete individual photos.
-
To view an private photo, click on the photo. Click again to show additional tools that can be used.
Figure : Individual photo tools

-
 - Delete the photo using the Delete icon.
 -
 - Cull what application to use to open the photo using the Open with icon.
 -
 - Select the photo every bit the lock screen image or photograph tile image using the Gear up as icon.
 -
 - Create a slide prove using the Slide show icon.
 -
 - Rotate the photo using the Rotate icon.
 -
 - Crop the photo using the Crop icon.
 -
 - Open up more editting tools by using the Edit icon.
-
Footstep 4: Practice more with Windows Photo Viewer in Windows 8 (Optional)
If y'all want to practise more with your photos, such as printing, emailing and more, use Windows Photograph Viewer.
annotation:In addition to viewing files you can explore the tabs in Windows Photo Viewer to print your photos, order prints, attach pictures to an email message, write the files on a disc, or open up photos in some other plan on your computer.
-
At the Offset screen, type pictures to open the Search charm. Select Pictures in the Search results.
Effigy : Pictures

-
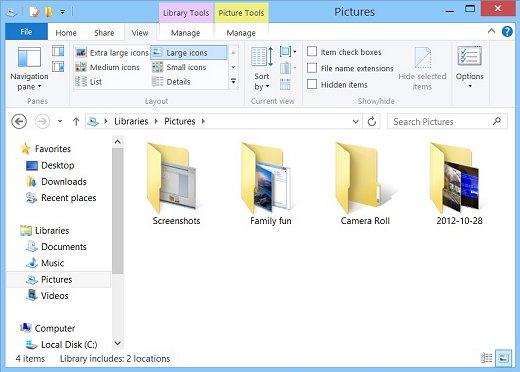
In the pictures library, open the folder containing the picture you desire to view.
Effigy : Photos in Pictures Library
-
Use one of the post-obit options to open the Windows Photograph Viewer:
-
Double click a flick. The picture opens in the Windows Photo Viewer.
-
If the picture does non open with the Windows Photo Viewer, correct-click the pic and select Open with. Select the Windows Photo Viewer.
Effigy : Select Windows Photo Viewer

-
-
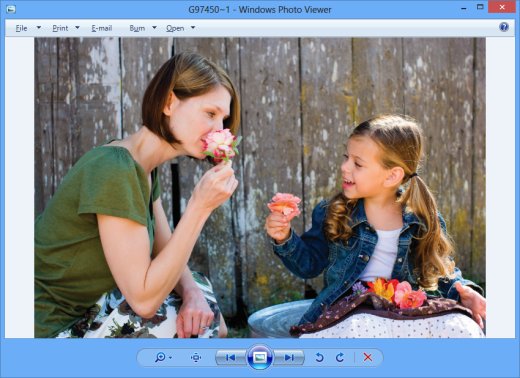
Use the buttons at the bottom of the screen to change the size of the movie, rotate the flick, or start a slide testify.
Windows Photo Viewer can be used to re-create, print, email, fire to disc, or open your photos in other programs.
Figure : Windows Photo Viewer options
notation:
Many more editing, storing, and sharing options are available from Windows Live Photo Gallery. To larn more than about additional features, see Windows Live Photo Gallery.
Source: https://support.hp.com/za-en/document/c03610920
Posted by: desmondbaccough.blogspot.com
0 Response to "How To Transfer Pictures From Camera To Laptop Email"
Post a Comment